

Patch 1.18
Support for PS5 system HDR calibration settings has been added to the game. Adjust the PS5 system HDR calibration using the information. Before adjusting, make sure you have set the TV settings correctly.
But the game retained the in-game HDR setting sliders. Be careful: the in-game calibration screen gives an incorrect representation of the peak brightness values. Check the actual game image.
Once you've finished adjusting your system's PS5 HDR calibration settings, set the in-game Highlights slider to "5" or higher.
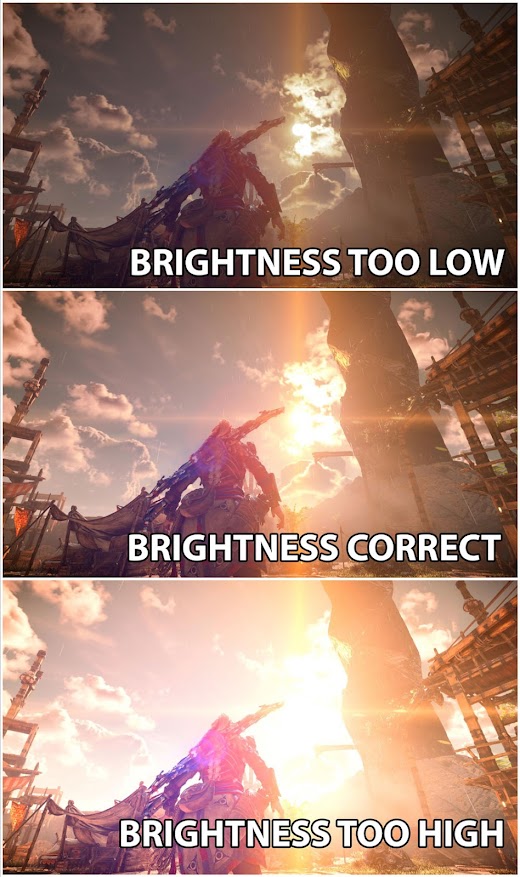
The Brightness slider adjusts the exposure level of the image. Adjust to an acceptable value so that the image is not dim, but the highlights of the surfaces are not very bright. The recommended value is 0.
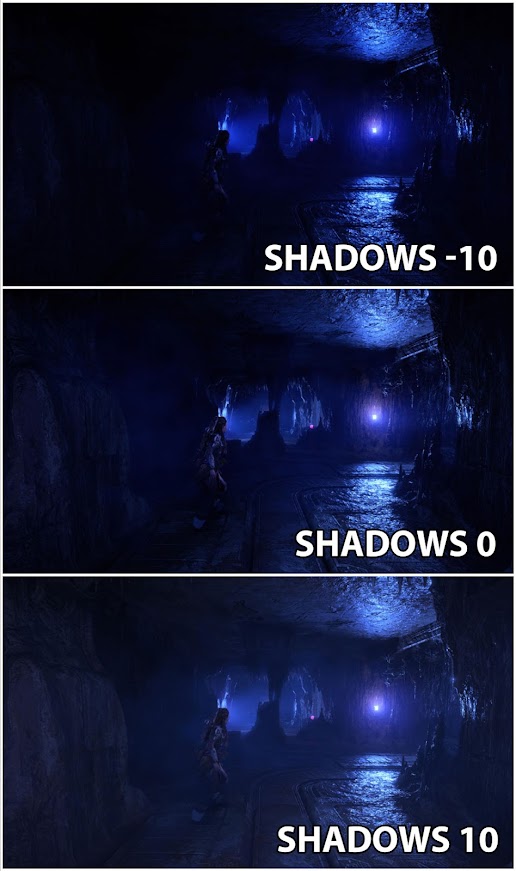
The Contrast slider adjusts the black level, adjust to achieve deep blacks but keep details in the shadows visible. The recommended value is 0.
Please note that the actual peak brightness level is slightly less than the level set in the PS5 system HDR settings. With your TV's tone mapping off (HGIG mode), light sources may appear slightly dim because of this.
| PS5 System HDR Calibration Step, Clicks | PS5 System HDR Calibration Pattern Brightness, Nits | Actual Game Brightness, Nits |
|---|---|---|
| 10 | 472 | 380 |
| 11 | 546 | 435 |
| 12 | 631 | 500 |
| 13 | 731 | 580 |
| 14 | 842 | 670 |
| 15 | 973 | 770 |
| 16 | 1122 | 900 |
| 17 | 1295 | 1025 |
| 18 | 1494 | 1180 |
| 19 | 1727 | 1350 |
| 20 | 1991 | 1530 |
| 21 | 2299 | 1750 |
| 22 | 2655 | 2030 |
Patch 1.17 or Below
Analysis
This game does not seem to use the PS4/PS5 HDR system calibration settings. The game settings have three options:
- Highlights - adjusts the peak brightness (i.e. the brightness of the brightest light sources, such as the sun, fire, etc.)
- Shadows - adjusts the black level (image contrast, detail visibility in shadows, etc.)
- Brightness - adjusts the overall image exposure, peak brightness and UI brightness.
It will be difficult for you to set the correct peak brightness for your TV for two reasons: the settings do not show specific values in nits, and also because the peak brightness is changed by two parameters at once (Highlight and Brightness). Because of this, by setting the correct peak brightness using the Highlights option, you can break this by adjusting the Brightness parameter.
The peak brightness that you set and see on the test image in HDR settings roughly corresponds to the peak brightness that you real see in the game, but there is a nuance. The peak brightness of some of the brightest light sources (sun, fire, etc.) will be higher than what you set. That is, the sun will be displayed with a brightness greater than your TV is able to show.
.jpg)
The peak brightness level you see on the test image in the settings menu is the Master Monitor Luminance (peak brightness of your tv) that most light sources aim for. But the actual peak brightness level of the game will be higher (could be several thousand nits) and will be outside the peak brightness limit of your TV. But you don't have to worry about that, it's normal for this game. Don't try to adjust the game's peak brightness, you adjust the Master Monitor Luminance (peak brightness of your tv). For simplicity, hereinafter, the term "peak brightness" will mean exactly Master Monitor Luminance and all the values of the tables are indicated for this.
Try to find data about the peak brightness of your TV on the site RTINGS.COM (value HDR peak brightness 10%). Before adjusting, make sure you have set the TV settings correctly.
Quick Way to Set Up
Do it if you can turn off your TV tone mapping.
1. Leave the Brightness parameter at 0.
2. Leave Shadows parameter at 0.
3. Adjust the Highlights value using the rule: the brightness of the light from the sun in the sky should be as bright as possible, but at the same time you should clearly see the details in the sky (clouds, etc.).

Also you can use the table below if you mean the brightness of your TV.
| Highlights Slider, Clicks (Brightness=0) | Peak Brightness, Nits |
|---|---|
| -10 | 430 |
| -9 | 470 |
| -8 | 575 |
| -7 | 685 |
| -6 | 790 |
| -5 | 930 |
| -4 | 1055 |
| -3 | 1250 |
| -2 | 1415 |
| -1 | 1575 |
| 0 | 1700 |
| 1 | 1960 |
| 2 | 2120 |
| 3 | 2200 |
| 4 | 2280 |
| 5 | 2475 |
| 6 | 2540 |
| 7 | 2760 |
| 8 | 2835 |
| 9 | 2915 |
| 10 | 3160 |
Difficult Way to Set Up
Do it if you can turn off your TV tone mapping and you don't like the result of setting the quick way. If after adjustment you do not like the resulting image (the image as a whole looks too bright or too dim), then you need to change the Brightness parameter. Decrease or increase the value until you get an acceptable result.
But since the Brightness option also changes the peak brightness of the light sources as well as the brightness of the UI, you may need to repeat the peak brightness adjustment using the procedure in step 3.
If you are satisfied with the overall exposure of the image, but the brightness of the sun, glare, fire, etc. seems too high for you: lower the Highlights value to get an acceptable result, but after that you may have to re-adjust the Brightness parameter.
The Shadows setting should not need to be adjusted in most cases if the black level and HDR RGB range settings on your TV are set correctly. But if the shadows seem too light to you, or vice versa, you see overcontrast and lose the visibility of details in the shadow, you can adjust the value.
The first table of peak brightness levels is relevant only when the value of the Brightness parameter is zero. If you change the Brightness setting, the peak brightness values will be different. To understand the approximate brightness levels for different combinations of the Brightness and Highlights slider, use the other table below.

Dynamic Tone Mapping Way
Your TV always does tone mapping and you can't turn it off. In this case, setting the peak brightness does not make sense. Any brightness levels will be transformed by your TV. It makes no sense to talk about "correct" images in this case. But you can do the following:
Set the Highlights to a very high value of several thousand nits (the tables will help you). After that, adjust the value of the Brightness parameter to get an acceptable exposure of the frame. But keep in mind that since your TV adapts all brightness levels to its liking, a great picture in one scene may not be as good in another scene.
Post a Comment